
Boost Comfort & Energy Savings with Blow-In Insulation
Even if you already have fiberglass batt insulation in your attic, adding blow-in insulation to your home’s attic can lower your annual energy cost by 10% all year long. That’s because blow-in insulation saves money by sealing small gaps and settling into open pockets. This fills in the sneaky spots that can allow your heat to escape from your home in the winter and allow it to seep in during the summer, making your air conditioner work overtime.
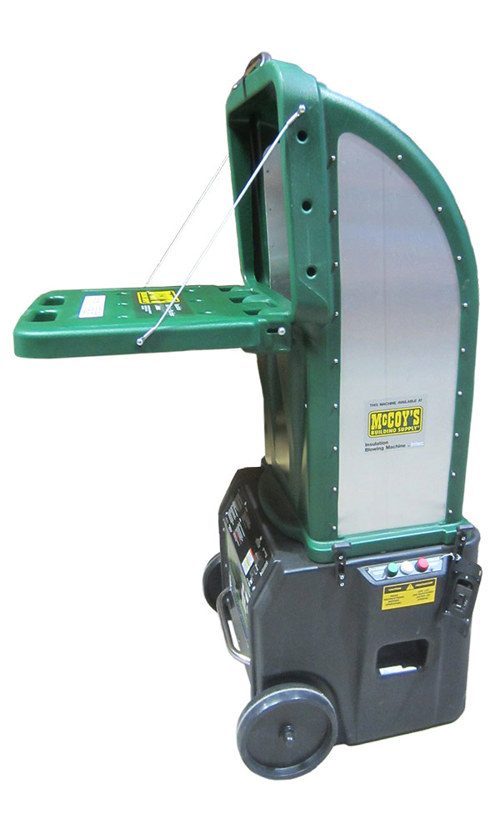
With a free loaner machine and our easy-to-follow instructions you can tackle this home improvement project and begin feeling the difference right away. You may even find your home is quieter because a thicker layer of insulation helps muffle sound. Best of all, unless you have a roof leak, you’ll probably never need to do this DIY project again!

What Types of Blow-in Insulation Are Available?

There are three main types of blow-in insulation. The most popular is formaldehyde-free fiberglass. This insulating material is low cost, light weight, and has a high loft or thickness. It makes an ideal attic insulation that’s easy to install in an existing home.
Another variety is cellulose blow-in insulation. This type is usually made of shredded cardboard or newspaper that’s been recycled and chemically treated for mold and fire resistance. It is also relatively heavy, and its weight can cause ceiling sag if improperly installed. If cellulose blow-in insulation gets damp, it compacts, becomes heavy as it holds moisture, and can even become a breeding ground for fungi.
Finally, there’s rock wool blow-in insulation. Also called mineral wool, rock wool is a very porous material that traps air. It is made from lava rock and chalk that is melted together at a very high temperature and then blown or spun into hair-like fibers. It tends to be expensive.
How Much Blow-in Insulation Do You Need?
All types of insulation are rated by their R value, a measure of how well a given material prevents heat from entering or leaving your home. McCoy’s states are mostly in Zones 2 and 3, where the R value is recommended by EnergyStar.gov to be R25 to R38, generally about 13 to 14 inches deep.
If you have existing insulation and it’s in good shape (you just don’t have enough of it) there’s no need to remove it. Blow-in insulation can be added on top of existing insulation to get the R-value you desire. However, if your existing insulation is even a tiny bit damp from a leak, remove and discard any damaged portions before adding blow-in insulation.
Before You Begin Your Blow-in Insulation Project
Follow these tips to get ready to add blow-in insulation to your attic.
- Purchase the necessary number of bags according to your needs using our handy chart based on the square footage of your attic and your desired R value. Make it even easier on yourself by placing your order online and picking it up in store.
- Call your local McCoy’s to reserve your free machine so it will be ready when you are.
- Arrange for a helper to load the bags of insulation into the machine.
- Get your protective gear. Wear a dust mask, goggles, gloves, and clothes you can discard after you’re done because the fibers are difficult to remove. If there are exposed nails in your attic, consider a hardhat. A bike helmet works too!
- Place boards or 5/8” plywood or 7/16” OSB sheets across 16” attic floor joists to create a platform to stand on. Don’t stand on joists—If you lose your balance, you’ll go right through the ceiling below.
- Use battery-operated lights to see into dark corners. LED headlamps are a great, hands-free way to direct light into the dark corners of an attic so you can be sure you’ve covered all the areas.
- If you have recessed lights bumping up into the attic, use scrap plywood or wallboard to build a box around them. Leave a minimum space of three inches between the light and the box. Do the same for any electrical junction boxes so you won’t have to dig through the insulation if you need to get to them.

Installing Blow-in Insulation
Installing blow-in insulation doesn’t require any special skill except the ability to withstand the heat in your attic if you tackle this project in summertime. Take frequent breaks out of the heat, drink plenty of water, and know the signs of when you’ve had enough of the heat. When you’re ready to begin, follow these steps:
- Connect the hose to the machine and get into position in the attic.
- Have an assistant feed in about half a bag and turn on the machine.
- Aim the hose to the farthest corner from the hatch or door and fill a small area to your desired depth.
- Work toward the door or hatch.
- Continue feeding the machine and blowing in the insulation, being careful to avoid blowing insulation out of the areas you’ve already filled.
- Go that extra mile and insulate your hatch by attaching weatherstripping and adding a layer of foam sheathing or fiberglass batt insulation. You can also install an attic hatch cover.

Kick Off the Job at your Local McCoy's
Head to your local McCoy’s and we’ll be happy to walk you through the process of properly installing blow-in insulation in an existing home and help you select the right products. We’ll also make sure we’ve got a free loaner machine ready for you—just bring it back when you’re done. In just a few hours, you’ll be ready to sit back and enjoy your energy-efficient home!
