
Ding Dong! Your Guide to Installing Doorbells
How to install a doorbell is something every homeowner should know, because a working doorbell is key to both security and convenience. It's a small feature of your home that makes a big difference in daily life from deliveries to friends popping over, and with the right tools and a little know-how, doorbell installation can be a straightforward weekend project.
Wired vs. Wireless Doorbells
When it comes to doorbell installation, the first decision is whether to go with a wired or wireless setup. A wired doorbell consists of four main components: the button outside, the wires connecting it to your home's electrical system, a transformer that regulates voltage, and the chime unit inside your home. These can be replaced independently or as a kit. These doorbells are known for durability, reliability, and minimal maintenance.
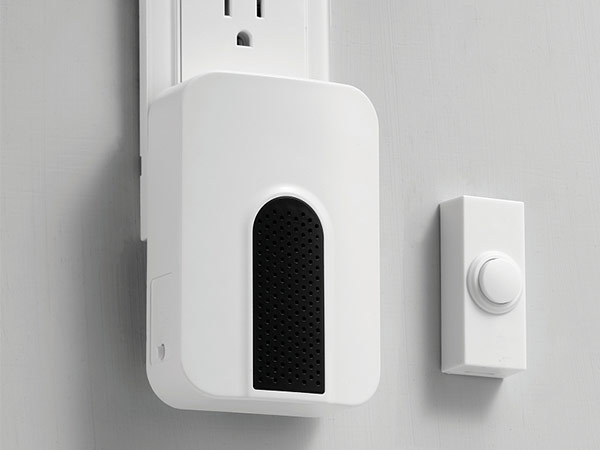
Wireless doorbells, on the other hand, are battery-powered or plug into an outlet and communicate via a signal between the button and the chime unit. They are typically faster to install and do not require any electrical work.
Comparison at a Glance
- Easy, fast installation
- No electrical skills needed
- Flexible placement
| Feature | Wired Doorbell | Wireless Doorbell |
|---|---|---|
| Pros | - Easy, fast installation - No electrical skills needed - Flexible placement |
- Easy, fast installation - No electrical skills needed - Flexible placement |
| Cons | - Requires electrical work - Longer installation time |
- Battery changes needed - Signal range may be limited |
| Best For | Homes with existing wiring or during renovations | Renters or quick DIY projects |
For homeowners comfortable working with wiring, a wired doorbell can provide long-term reliability and a chime you can hear anywhere in your home. Wireless doorbells appeal to those looking for a quick installation or a setup that can be easily moved without modifying the home's wiring.
Tools and Materials You'll Need
Before you start your doorbell installation, gather what you'll need so the job goes smoothly.
For Wired Doorbells:
- Voltage tester — to ensure power is off before handling wires
- Screwdriver — for removing the old doorbell and installing the new one
- Wire strippers — to prepare wires for connection
- Drill — for mounting the button or chime if needed
- Electrical tape — to secure wire connections
- New wired doorbell or chime system
For Wireless Doorbells:
- Drill (optional) — only if you’re using screws to mount the button
- Mounting hardware or adhesive — for attaching the button to the wall
- Batteries (if required) — for the button or chime unit
- Screwdriver — to secure the button or chime as needed
- New wired doorbell or chime system
Having your tools and parts ready before you begin makes installing a doorbell quicker and less stressful.


5 Steps for Installing a Wired Doorbell
Step 1: Turn Off the Power
- Locate your home’s circuit breaker and switch off the power to the existing doorbell.
- Double-check with a voltage tester to ensure the wires are safe to touch.
Step 2: Remove the Old Doorbell
- Unscrew the existing doorbell button.
- Gently pull it away from the wall to expose the wires.
- Disconnect the wires by loosening the terminal screws. One wire goes to the transformer, and the other goes to the chimes.
- Tape the wires to the wall to avoid losing them behind the wall.
Step 3: Connect the New Doorbell
- Attach the wires to the new doorbell button’s terminals (either wire can connect to either terminal). Hook each wire around the screws.
- Tighten the screws securely.
- If replacing the indoor chime, follow the same process to connect the wiring there.
Step 4: Mount the Doorbell
- Use a drill to make holes if needed.
- Secure the new doorbell button to the wall or door frame with screws.
Step 5: Restore Power and Test
- Turn the circuit breaker back on.
- Press the button to check that the chime works.
- If it doesn’t ring, double-check connections and ensure the transformer is functioning.
If the transformer needs to be replaced, it’s best to contact an electrician.


5 Steps for Wireless Doorbell Installation
Step 1: Choose the Location
- Pick a spot for the doorbell button near your main entry, if you are not exchanging for an older doorbell.
- Avoid mounting on metal surfaces, as they can weaken the signal.
Step 2: Remove the Old Doorbell
- Remove the button from the mounting bracket.
- Unscrew the old mounting bracket.
- Remove the chime unit the same way as the doorbell, if replacing it.
Step 3: Mount the Doorbell Button
- If using screws: mark holes, drill if needed, and secure the button with screws.
- If using adhesive: clean the surface, peel the backing, and press firmly into place.
- Insert batteries if required by your model.
Step 4: Set Up the Chime Receiver
- Plug the chime unit into an outlet inside your home or mount it if it’s battery powered.
- Follow the manufacturer’s instructions to pair the button with the chime.
- Ensure the chime unit is in a location that can be heard in all parts of the home.
Step 5: Test the System
- Press the button to check the range and volume.
- Move the chime receiver if the signal is weak.
- Adjust chime settings (volume or tone) as needed.
Choosing between a wired or wireless doorbell comes down to budget, skill level, and your home’s wiring. Wired doorbells offer long-term reliability with minimal upkeep, while wireless models are quick to install and flexible in placement. Doorbell installation is a manageable DIY project that most homeowners can complete in an afternoon. McCoy’s Building Supply has all the tools, hardware, and advice you need—from wire strippers and mounting kits to batteries and screws.
