


The Gritty Truth About Grout
Grout is a binding agent used when installing tile. It protects a surface from moisture and adds stability to a tiled surface, like a wall or floor. When dry, grout creates a solid barrier that prevents moisture, dirt, or other debris from getting into the materials behind it. Grout also keeps tiles in line, and without it, the edges of tiles would likely shift and rub to the point where they would crack and break.
But choosing the right grout for the job can be tricky, especially since there are more types available than you likely ever imagined. So, what's right for you?
Types of Grout: Cement-Based and Epoxy-Based
Picturing a brick wall, you might imagine blobs of cement-based mortar and bricks. But grout isn’t the same as mortar. Unlike mortar, grout is a more watery substance used to keep tiles in place. You might use thick mortar to stick a tile to a surface, like a wall, but those gaps between tiles are where you use viscous grout.
Common grouts are typically cement-based and consist of a mixture of cement, water, and sometimes sand. There are three main kinds of cement options:
- Sanded: Like the name says, this type contains fine sand. And you’ve probably seen it in bathroom tiles, either on the floor or walls. Sand adds a lot of strength to a grout mixture, meaning it can stand up to a lot of foot traffic or weight. It has a gritty texture, and is best used in seams between tiles that are 1/8-inch or wider. When sanded grout dries, it doesn’t shrink very much at all.
- Unsanded: For smaller seams, less than 1/8-inch wide, an unsanded option can be a good choice. Since it lacks the gritty sand component, you don’t have the problem of irregular sand particles in a tight space. It has a smooth texture (not gritty) and won’t scratch delicate tiles. It will, however, shrink more than sanded grout as it dries, and if used in gaps that are too large, it will crack.
- Polymer cement: With additives like latex polymers, this type is known for its additional strength and water resistance. It can be used in large gaps up to 1/4;-inches wide. You might see polymer cement grout in commercial spaces, or areas with lots of foot traffic or stress, like entryways or kitchen backsplashes.
Epoxy-based grouts tend to be more expensive than cement-based grouts, but they also come with added benefits like strength, durability, and stain resistance. They can be found in two main types— emulsion and furan:
- Emulsion: Epoxy emulsion grouts are a mixture of cement and epoxy resins. They can absorb liquids and stain, unlike some epoxy grouts, and are somewhat porous. They do however have greater strength and chemical resistance than polymer cement grouts.
- Furan: chemical and heat resistant, furan grouts can be found in industrial or home settings. You might see furan grout used in places with lots of heat, like commercial kitchens or fireplaces. It also is used in wet environments, like pools, where its superior water resistance gets to shine.
Epoxy grouts require more time to cure than cement ones, and should be installed by a trained professional who is familiar with the process.
Should You Seal Grout?
The short answer is – yes, if it needs to be sealed. Epoxy-based don’t require a sealant. Cement-based are in need of sealing, however, since they are more porous by nature. Resealing should be done regularly:
- Every six months for tubs and showers.
- Every one year for countertops or bathroom floors.
- Every two years for anything that has minimal water contact.
How to Reseal Grout Correctly
To seal or reseal, follow the manufacturer’s recommendations based on the type of grout that has been used. Wait to seal new grout until after it has fully dried and cured (a timeframe that will vary, depending on the conditions and product used).
Use a grout cleaner (appropriate for your tiles and grout) and an old toothbrush or grout brush to carefully clean the grout you plan to reseal. Wear gloves to protect your hands. Gently clean out any dirt or mold or mildew from the grout, being careful to inspect the area for any signs of tile damage or cracked grout. After the grout is clean, allow it to completely dry before you move on to seal it.
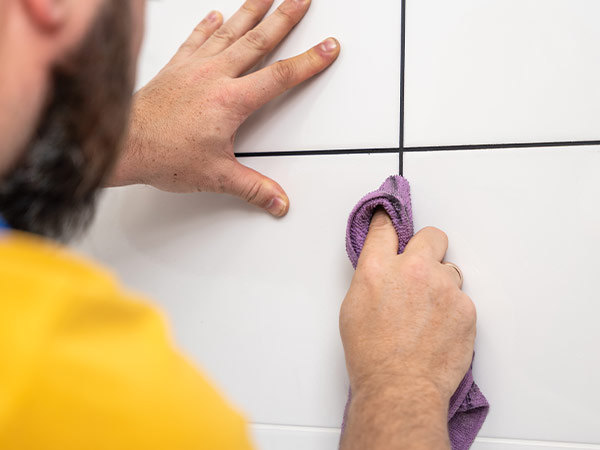
To seal grout, follow the instructions on your product. Most sealant can be applied with a simple foam paint brush. After applying it evenly, you typically wait 10 minutes, then wipe away excess sealant with a damp cloth. You then apply a second coat and repeat the previous steps.
Test the sealant by sprinkling a few drops of water and see if it beads. If it doesn’t, you should repeat the sealant process. Once it is all appropriately sealed, wait the required amount of time listed on the package – likely 24 to 38 hours – before walking on, or using the area you sealed.
Grout Problems, Maintenance, and Cleaning
You’ll know when it’s time to re-do grout when you notice wear and tear that could compromise the material behind the tile. This could include cracking grout, or a chip in tiles that could let water or dirt in, or an excess of mold or mildew. Especially common in wet areas, mildew and mold can be difficult to control. (Regular grout cleaning and resealing can help stem the tide.)
Clean grout with simple grout cleaners, or make a paste of baking soda, hydrogen peroxide, and dish soap. You can also clean grout with a steam cleaner to kill mildew and bacteria. Don’t use bleach, acidic cleaners, or waxy or oil-based cleaners, as these could damage the grout or tile.
Does Your Grout Need Some TLC? We Can Help!
Keep your grout game on point at your local McCoy’s. We can help you make the right choices to stick your tile project together, so it doesn’t fall apart. You can even take advantage of our local delivery service to get materials delivered. That should help to keep your tile and grout project all in line.